Getting Started
New to CPQ3D? Start with What is CPQ3D? — it explains what the configurator does, shows how it looks, and why it works. This page covers how to sign up and get it live on your website.
Create your account
There are two ways to sign up: directly from the CPQ3D homepage with your own website URL, or via an invite link from a manufacturer or distributor you work with. Here's the self-service path — step by step.
Step 1: Enter your website URL
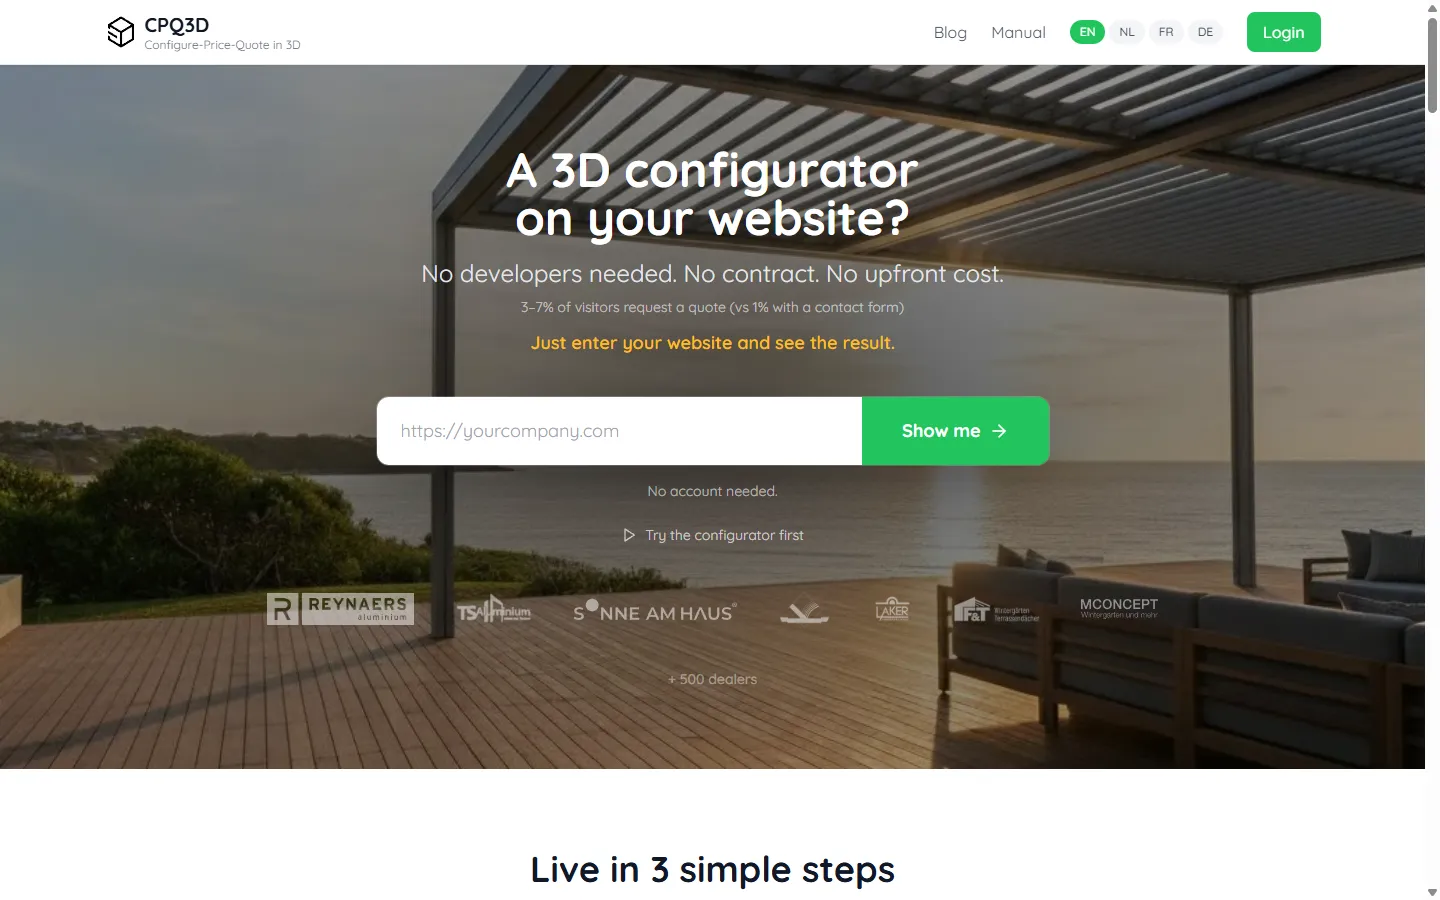
Go to cpq3d.com and enter your company website in the "Get Started Free" field. CPQ3D will scan your website to auto-detect your company name, logo, and product images.
Step 2: CPQ3D scans your website
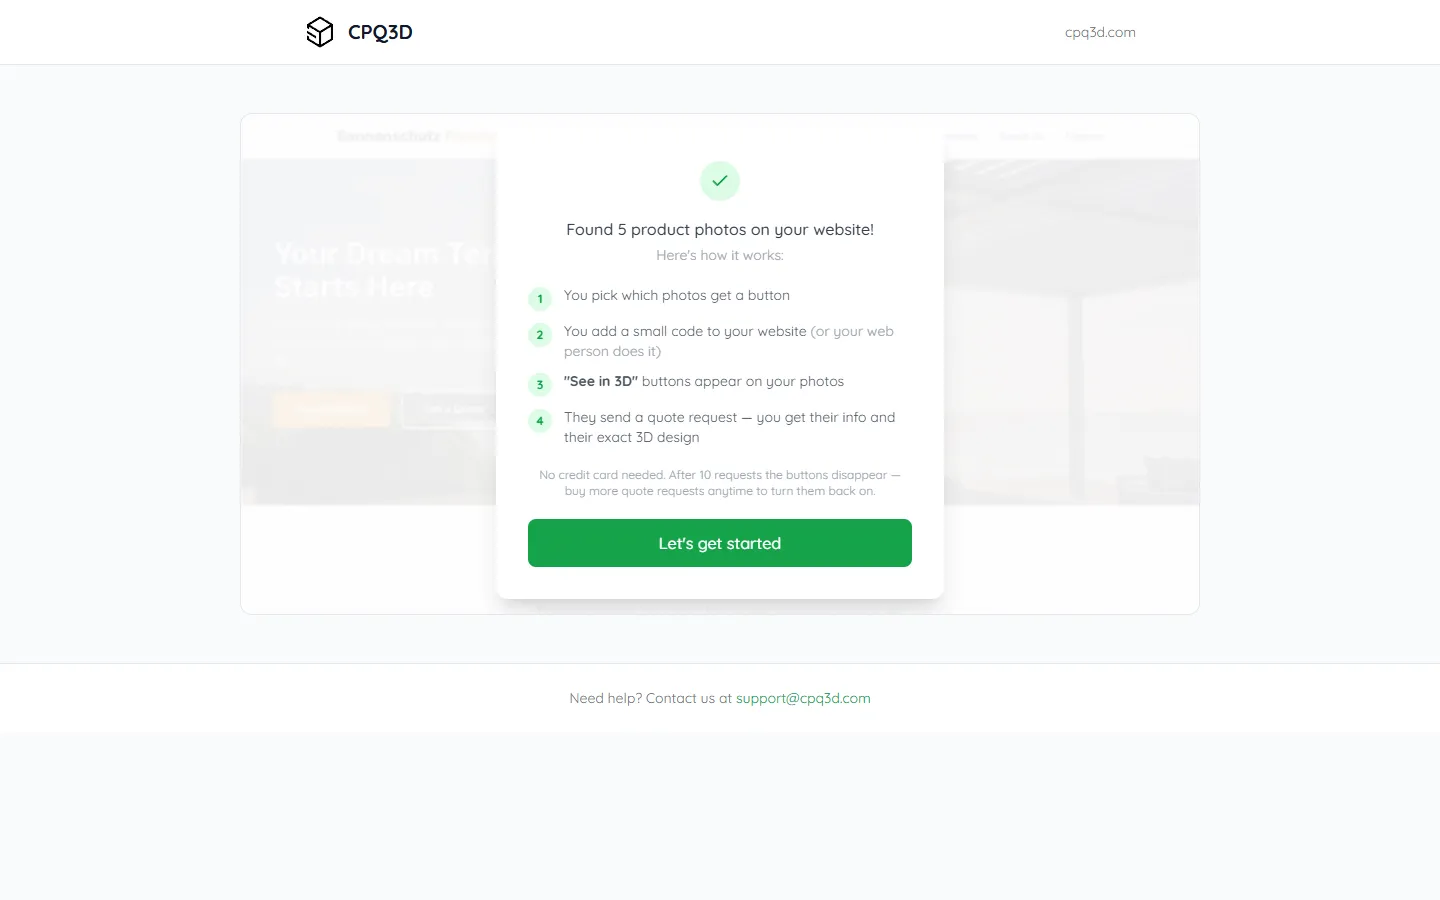
After clicking "Get Started Free", CPQ3D scans your website and finds your product images. It auto-detects your company name and email address.
Step 3: Choose which pages and images link to your configurator
CPQ3D scans your website and shows you each product image it found. For each one, you decide whether to add a configurator button. You can change these settings at any time from your dashboard — this step just sets up the initial configuration.
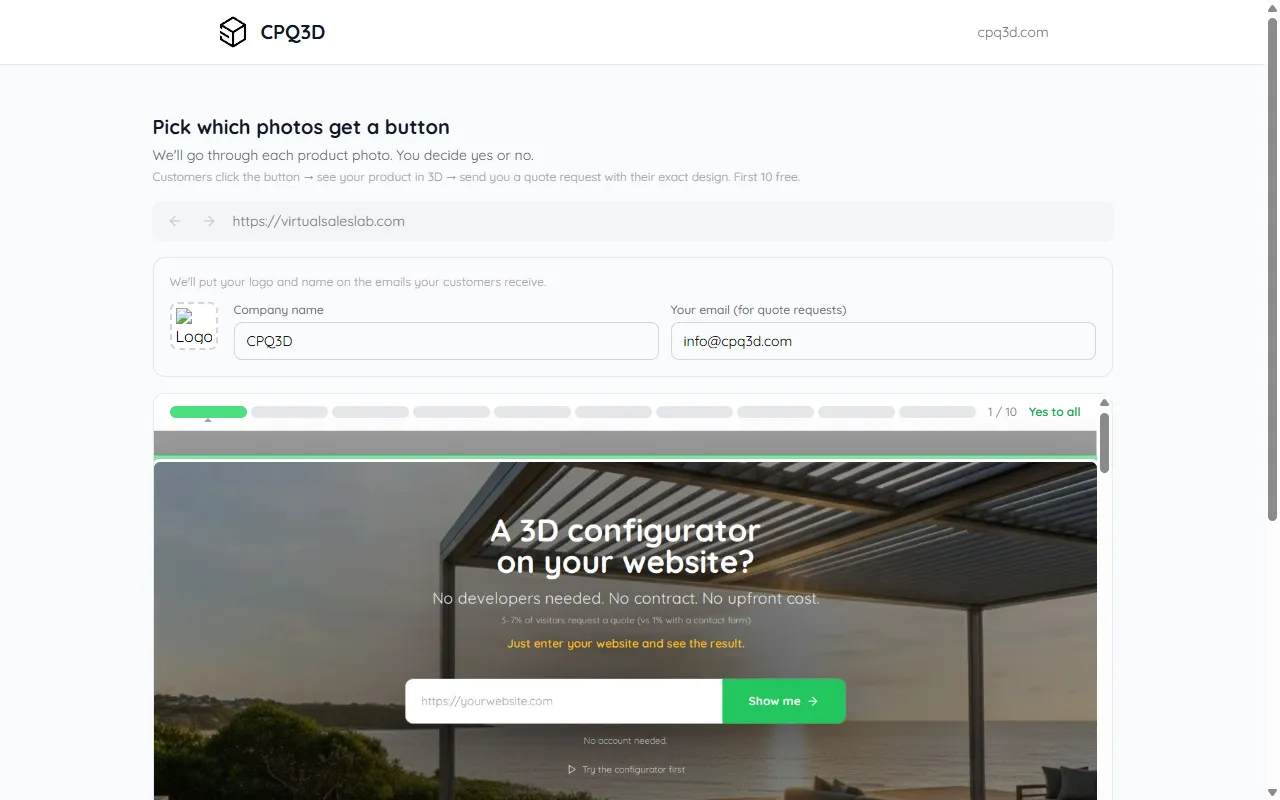
You can also click "Yes to all" to add a configurator button to every product image at once. Or click "Continue without buttons" at any point to skip this step entirely — the button is always available, even if product images were found. You can configure image buttons from your dashboard later.
Step 4: You're all set!
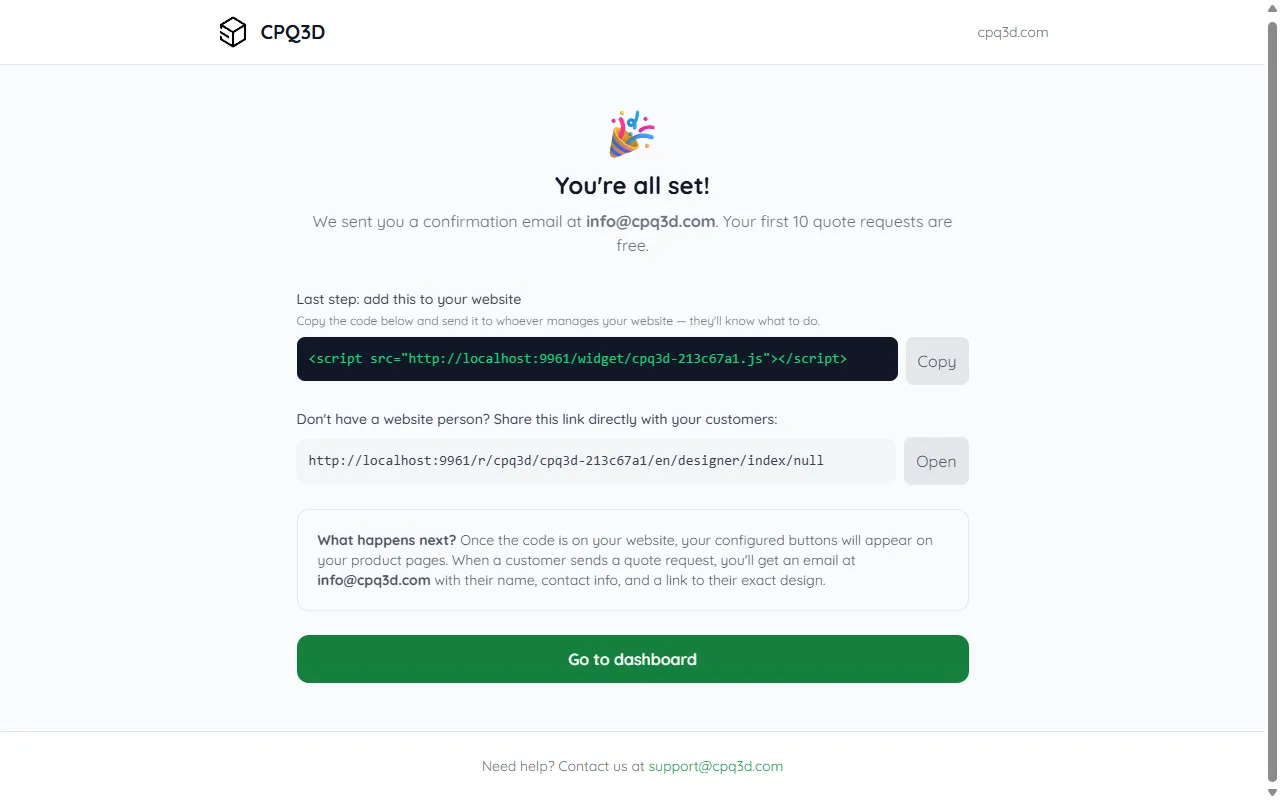
CPQ3D creates your account and sends a confirmation email. You get your widget code and a direct configurator URL you can share with customers immediately.
The confirmation email
After signing up, CPQ3D sends you a confirmation email with a login button. Click it to finish setting up your account.
Subject: "Set up your 3D configurator - CPQ3D"
Hi! I'm Tom from CPQ3D. Click the button below to set up your 3D configurator...
This link expires in 24 hours.
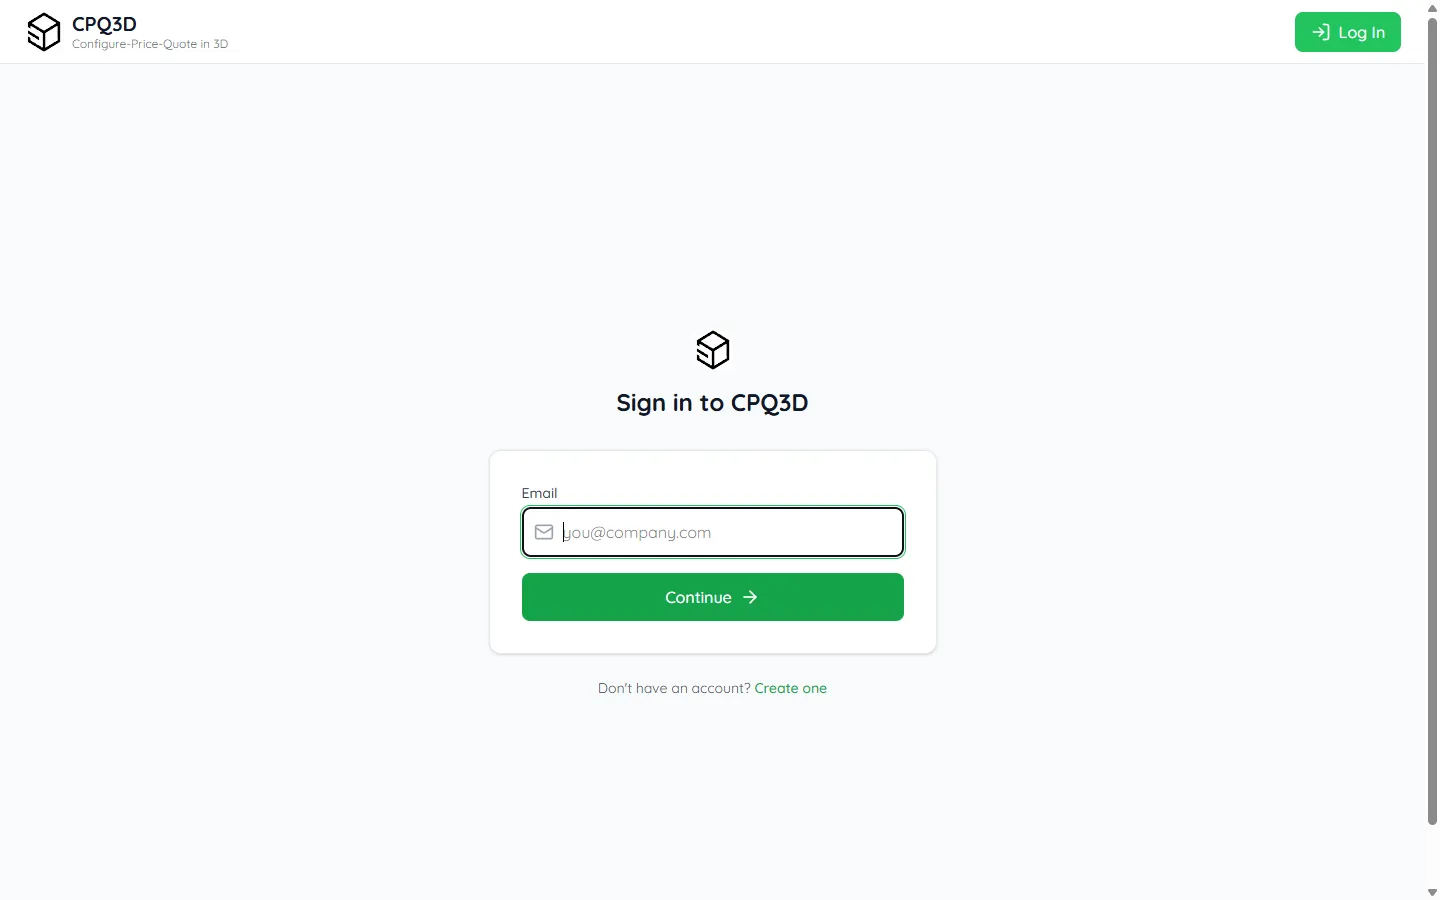
Log in to your account
Already have an account? Go to admin.cpq3d.com and enter your email address.
CPQ3D automatically picks the right login method based on how you signed up:
- Password — If you set a password during signup, you'll be asked for it.
- Login link by email — If you didn't set a password, CPQ3D emails you a one-click login link (valid for 1 hour).
- Old VirtualSalesLab account — You'll be guided through a one-time password reset to move your account over.
Forgot your password?
If you set a password and can't remember it, click "Forgot password?" on the login page. Enter your email and we'll send you a reset link. Click the link in that email to set a new password.
If you never set a password (most users don't need one), just log in with the email link instead — go to admin.cpq3d.com ↗ , enter your email, and choose "Send me a login link".
Get the configurator on your website
After signup, CPQ3D gives you two things: a widget code and a direct link. You can use one or both.
Option 1 — Configurator buttons on your product photos
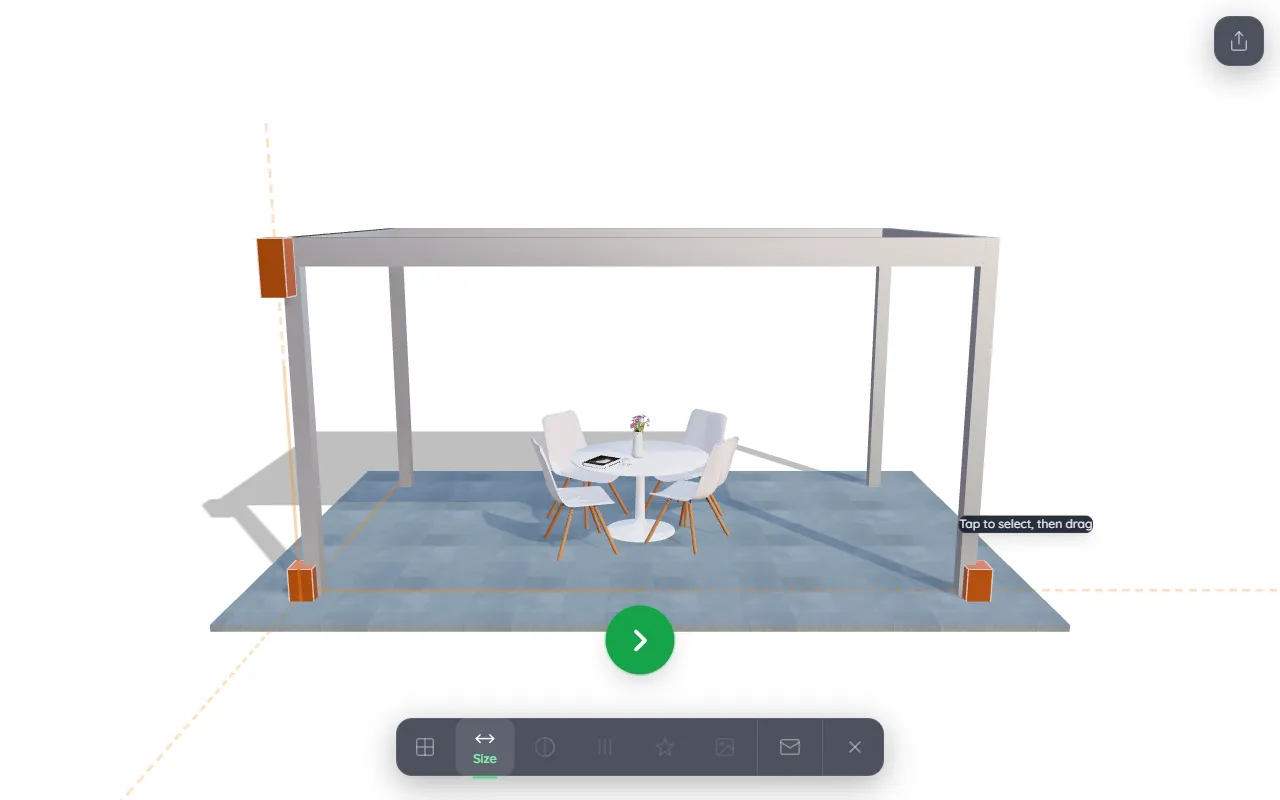
A small button appears on each product photo you selected. Visitors click it and the configurator opens right there on your page — no new tab, no leaving your site.
When a visitor clicks the button, this is what they see:
To make the buttons appear, paste the widget code once into your website — that's it. The buttons load automatically for every visitor from that point on.
Option 2 — A direct link to the configurator
A web address that opens the configurator on its own page. No code to paste — just copy the link and share it: in an email, a WhatsApp message, a button on your site, or as a QR code on a brochure.
How to add the widget code — by platform
Choose your website platform below:
WordPress
The easiest way is to install the free plugin Insert Headers and Footers. Once installed, go to Settings → Insert Headers and Footers, paste the code in the Scripts in Footer box, and save. Done.
If you use a page builder like Elementor or Divi, you can also add a Custom HTML block anywhere on the page and paste the code there.
Wix
In your Wix editor, go to Settings → Custom Code. Click Add Code, paste the code, set the placement to Body - End, and choose All pages. Click Save.
Squarespace
Go to Settings → Advanced → Code Injection. Paste the code in the Footer box and click Save.
Webflow
Go to Project Settings → Custom Code → Footer Code. Paste the code and publish your site.
I don't know which platform my website uses
No problem. Send an email to info@cpq3d.com and we'll help you get it set up. Mention your website address and who built your website if you know.
Alternatively, you can skip the website integration entirely and just use the direct link from Option 2 above — share it with customers by email or WhatsApp and they can open the configurator directly.
Common questions
I didn't receive the login email
My login link says "expired" or "already used"
Someone else already registered my domain
I don't want buttons on my website photos
I forgot my password
The "See in 3D" buttons aren't showing on my website
Can I use it on multiple websites?
Will this slow down my website?
Do I need a password?
What did CPQ3D find when it scanned my website?
Was this page helpful?
Thanks for the feedback!